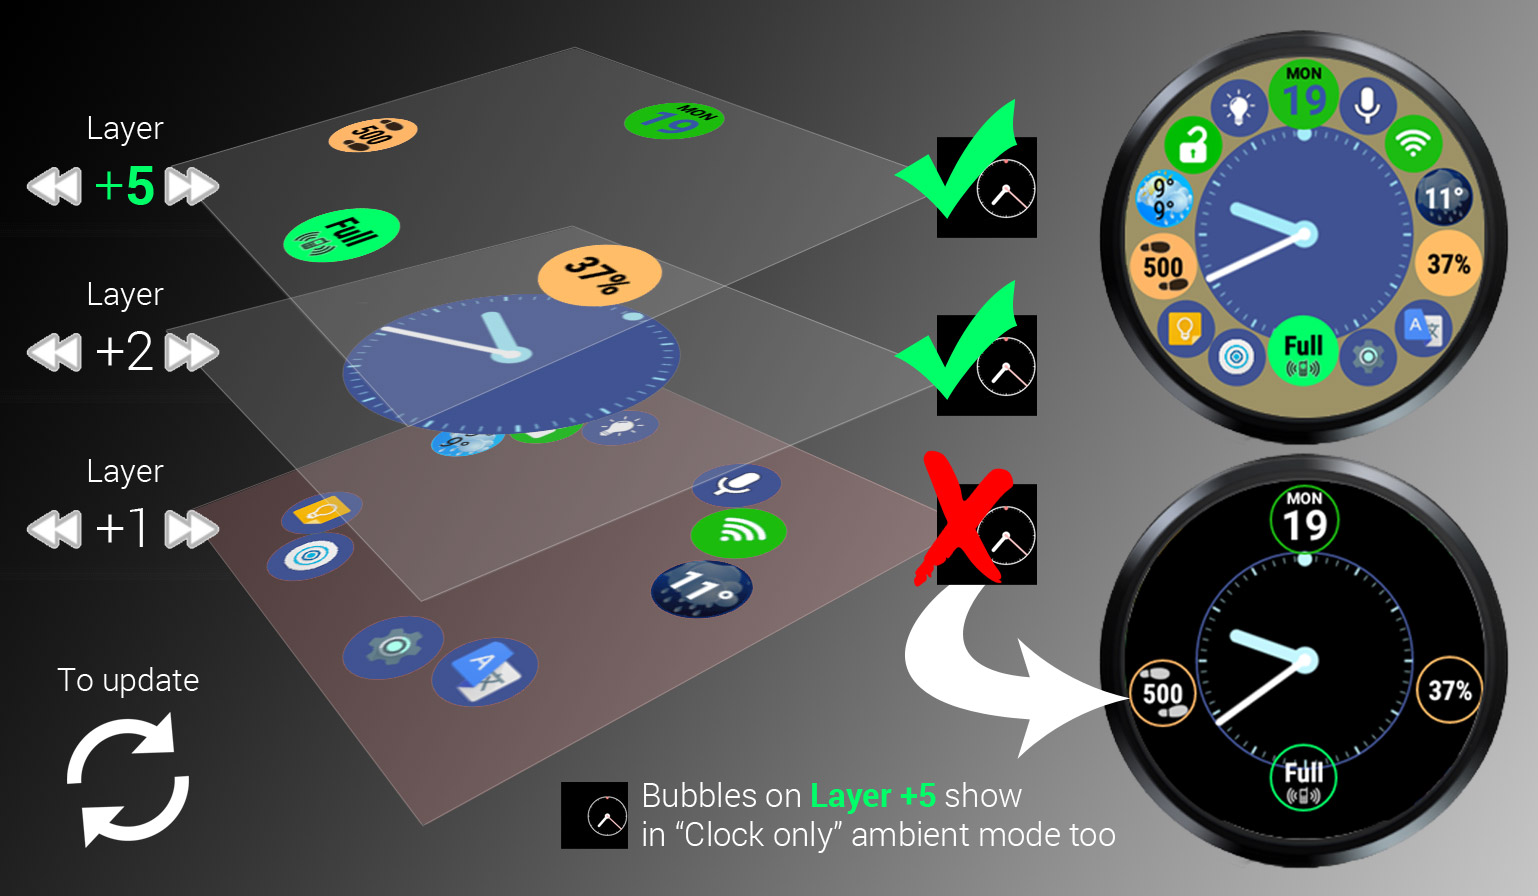
Effective in custom (user modified) layouts:
►the positive number associated with the bubble sets the layer
►the higher layers overlap lower ones
►important: tap the “update” button to commit layer changes
BACKGROUND
This gives you extra freedom in placing bubbles on top of each other (usually the clock). As an added benefit now you can have more than just the clock on the reduced content (formerly “Clock only”) ambient screen.
SIZE → LAYER
The bubble weight control becomes meaningless as soon as you disable the [ ] Auto Layouts and take things into your own hands. I realized we could use this value to control “vertical” placement. You have 9 layers (and you can move the Clock even “higher”). But you should actually keep to clock closer to the “bottom” (Layer 1 or 2) so other bubbles which you overlap with the clock can show up on top and not be hidden (and able to receive clicks).
RED TINT
The layers “below” the clock layer are marked with a light tint of red to warn you, that bubbles there can get hidden by the clock bubble when overlapping.
GREEN TINT
The bubbles on Layer 5 are marked with a faint green tint, but only if you enable the “Clock only” ambient mode in the “Watchface” card (in the previous screen). These bubbles will show along with the clock bubble when the screen dims.