Video
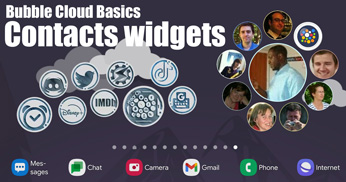
This short video explains how to create Contact Bubble Widgets and Contact Bubble Folders on the home screen of your phone or tablet, and ways to customize them:
Creating a Contact Widget for Your Android Device: A Step-by-Step Guide
Android users are always looking for ways to customize their devices to make them more efficient and user-friendly. One of the ways to do this is by creating widgets that give quick access to essential features on your phone. One such widget is the Contact Widget that allows you to quickly access your contacts without having to search for them in your phone book. In this post, we will provide you with a step-by-step guide on how to create a Contact Widget for your Android device.
Step 1: Long Press the Background
The first step in creating a Contact Widget is to long-press on the background of your home screen. This will bring up a menu with options to add Widgets, Wallpapers, and other settings.
Step 2: Tap on Widgets
Next, tap on the Widgets option at the bottom of the menu. This will open a list of widgets that are available on your device.
Step 3: Select Bubble Cloud Group
Look for the Bubble Cloud Group app among the list of widgets. If you have the app installed twice, select the first one.
Step 4: Choose the Contact Widget
Once you have selected Bubble Cloud Group, you will see three types of widgets: App bubbles, Bookmark bubble cloud, and Contact bubble cloud. Select the Contact bubble cloud widget.
Step 5: Resize the Widget
It is essential to resize the widget to ensure that it fills the screen’s available space. The widget will prompt you to do so.
Step 6: Name the Cloud
Naming the cloud is crucial to keep track of it and manage it later. You can also choose a background color for the cloud.
Step 7: Add Contacts to the Widget
Now, press the yellow plus sign to add contacts to your widget. You can select individual contacts or contact groups.
Step 8: Customize the Bubble Action
By default, the bubble action is set to petals, but you can change it to directly open WhatsApp, send an SMS message, or call. You can also choose to have petals appear around the bubble, and then you can select what you want to do with that bubble.
Step 9: Save the Widget
After customizing the widget, click on the checkmark to save it and exit edit mode.
Option 1: Customize the Bubbles
Customize the bubbles by changing their size, weight, and picture. You can also delete bubbles or import a picture from your phone.
Option 2: Add More Contacts
You can add more contacts to the widget by clicking on the pencil, or double clicking the background, click on the circle plus icon () then in the Cloud Configuration screen use the yellow plus sign again or swipe sideways to access the list of contacts.
Option 3: Create Contact Folders
In addition to the Contact Widget, you can also create Contact Folders that group your contacts. Two ways to create a Contact Folder:
- either drag the “Contact Bubbles Folder” icon from the widget group of the launcher directly to the screen, name the cloud and add bubbles
- or add the Contact Bubbles Folder to your widget, in the Widget Configuration screen. Then the contact folder bubble will be one of the bubbles in the widget, which opens the pop-up cloud.
Conclusion
Creating a Contact Widget and Contact Folder on your Android device is a great way to make accessing your contacts more accessible and efficient.