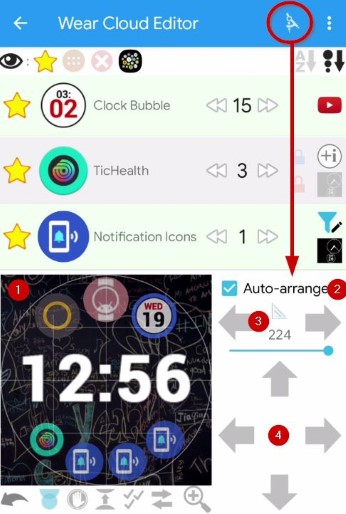
Tap on the “drawing compass” icon in the top action bar of the Wear Cloud Editor to show/hide the custom layout editor to manually arrange bubbles in the Favorites cloud (watch face). Refer to the numbered controls on the right:
- Watch screen canvas with all favorited bubbles. Tap to select bubbles (unselected bubbles are dimmed)
- Auto-arrange toggle brings up Smart Auto Layout selector when enabled (automatically disabled when you adjust position/size of any bubble)
- Bubble size controls: use seek bar for big, arrows for fine adjustments for selected bubble. Use multi-select-tool to set bubbles to same size.
- Drag bubbles in the canvas, or use these 4 arrows for fine-positioning. Use multi-select-tool to move bubbles together
Notes:
- Custom layouts are hardware dependent, and will not scale for different resolution watch screens. Newly added bubbles to the Favorite Cloud will collect in the upper right corner.
- Consider using Smart Auto Layouts instead, which place the bubbles more precisely, and being dynamic, you will not need to rearrange the bubbles if you add or remove bubbles to your Favorites
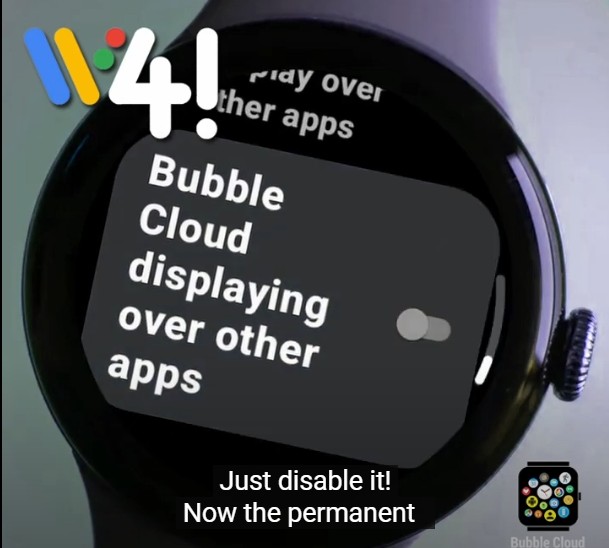
- On the other hand custom layout is useful for lining up bubbles in special favorite background images (e.g. to control Smart Home devices on a photo of your house). Customized Favorites cloud can also be used as Wear OS tile.
- Copy / Paste layouts using the Overflow Menu command “Layout ↔ Clipboard”
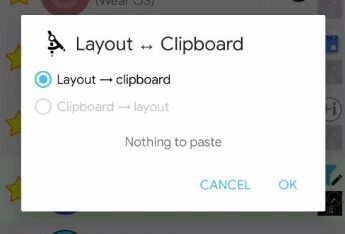
Use any text editor, note taking app etc. to save copied layouts. They are simply a list of coordinates and dimensions (which you can even try to modify before pasting back to Bubble Clouds – Recommended to test with few bubbles first)
Also see How to save and restore your watch settings?  Changes are periodically updated on the watch, tap the Sync icon in the action bar to refresh the layout on the screen of your watch
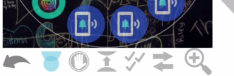 Tools
Tools
Below the watch screen canvas area the row of tools control how bubbles can be dragged and resized:
 Free move mode
Bubbles are allowed to be placed on top of each other, they can overlap. Bubbles with higher weight setting will appear below lower weight bubbles (set bubble weights in the Wear Cloud Editor)
 Bump mode
Bubbles cannot overlap when dragged, fine-positioned or resized. Bubble spacing value (set for Smart Auto Layout screen) is also applied.
 Push mode
Bubbles cannot overlap, they will push each other when dragged or resized closer than the bubble spacing value (set in Smart Auto Layout screen).
 Multi-select tool
Tap bubbles to select / deselect them. Selected bubbles are moved, resized together, and you can even set their color and weight together in the Wear Cloud Editor list above the custom layout as shown from 0:48 in this video:
 Magnifier tool
Toggle to zoom in for precise changes
x
 Undo last action
Note: it’s not an undo buffer, you can only reverse your last action. Tap again to redo.
x